Colorado Inspired

Colorado Inspired
Colorado Inspired

Winter Wonderland Wood Sign

Winter Wonderland Wood Sign
Winter Wonderland

Valentine's Designs

Valentine's Designs
Valentine's Designs

Last Day of Prep for Thanksgiving

The last day of prep is finally here, it's now or never!  I've got the focaccia bread made, french baguettes for the baked fontina, and the pies are in the process.  The vegetable platter for appetizers has been made, and that just leaves the caramelized onion and poblano dip to make for today.

Ingredients:
1/4 cup sunflower oil or safflower oil
3 cups diced white onion
3 fresh poblano chilies, seeded and diced
1 tbsp coriander seeds, toasted and ground
1/4 cup fresh squeezed lime juice
4 ounces of room temperature cream cheese
1/2 cup sour cream
cayenne pepper for a kick if you want

Directions:
Heat oil in a large skillet over medium heat.


 Add onion , chilies, toasted and ground coriander, plus 1 tsp of salt.


Cook until onions and chilies are tender and caramelized about 30 minutes.  Let cool completely.


Stir together lime juice, cream cheese, and sour cream in a large bowl, and stir together until smooth.


Once onions mixture is completely cooled, stir together cream cheese mixture and onion mixture.  Refrigerate at least one hour or up to one day, which is exactly the early prep I needed.


Sprinkle with cayenne, and serve with cut veggies, like jicama, radishes, tortilla chips, and cucumbers.  It will be a perfect appetizer.

Side note: Toasting the coriander.


In a dry saute pan, add the desired amount of your spice, in this case coriander.  Heat the skillet over medium heat, and toast until the seeds become fragrant.  Once you can smell them, remove from heat, and grind.


Hope you all have a happy thanksgiving!  It's been fun sharing my prep with you all!
0

Best Turkey Brine

Last item of today, must do the turkey brine.  This is absolutely the best brine.  It makes not only the best Thanksgiving day turkey, but a good turkey stock as well.  Another Martha Stewart Favorite recipe!

Ingredients:
7 quarts of water
1 1/2 cups of salt
6 bay leaves
2 tbsp whole coriander seeds
1 tbsp dried juniper berries
2 tbsp whole black peppercorns
1 tbsp fennel seeds
1 tsp brown mustard seeds
1 turkey
1 bottle of Riesling
2 onions, thinly sliced
6 garlic cloves, crushed
1 bunch fresh thyme

Directions:
Bring 1 quart of water, salt, and all dried spices plus bay leaves to a boil, and then reduce to a simmer until the salt has dissolved.


Turn off burner, and let the mixture cool for at least 5-10 minutes.  Use a turkey oven bag, and line a food grade 5 gallon bucket.  I have a beer and wine making kit with a food grade 5 gallon bucket.  If not, use a large stock pot.


Place turkey, onions, garlic, thyme, and wine in the turkey bag.  Then add the rest of the water.


Finally add the cooled spice mixture, and turn the turkey in the liquid to mix everything together. Submerge the turkey in the brine, then place it in the refrigerator.  Have the turkey in the brine for at least 24 hours, and mine will sit in the brine for about 36 hours, until Thursday morning.


This is the best flavor injector for the juiciest turkey, and the best turkey stock for later.

0

Thanksgiving Prep Day 3

It's prep day 3, and things are getting a little busier, but feeling good so far. The cranberry-ginger relish is complete, and ready to move to the refrigerator till Thursday.  I had struggled with the cranberry side of Thanksgiving until I found this recipe a few years ago, and it has been in my arsenal ever since.  I love that it's a natural way to use cranberries, not just a red dish on the table that you assume is cranberry sauce.

Ingredients:
1 12oz bag of fresh cranberries
1 cup sugar
1 tbsp of grated fresh ginger
2 tbsp water
2 tbsp of red-wine vinegar


Directions:


In a sauce pan, bring cranberries, sugar, ginger, and water to boil. Once that happens reduce heat to a medium-low, and simmer until the cranberries start to pop, which will take about 10 min.


Stir in vinegar and remove from heat.


This is what the cranberry relish looks like after most of the cranberries have popped.


Let the mixture cool to room temperature before serving.


Sourdough bread is finally finished, and smells delicious.  Kinda wish I was eating it, and not just making it for the stuffing, but I do have some leftover starter, so I will make another loaf to just eat. But not this week! :)


Last, but certainly not least for today, I got the tablecloth and napkins ironed and on the table.


Plan on setting it tomorrow afternoon.


One more prep day to go!


0

Thanksgiving Prep Day 2

So I know I said today was my lightest day as far as work in the kitchen, but I don't think that I should have played hooky most of the day with my daughter.  I did manage to make the dough for both of the pies that I will be making on Wednesday, however the sourdough bread will get made tomorrow, but boy we had fun today!  I use a Martha Stewart recipe, she is probably one of my go to chef's for any occasion.  I have made her recipes untested for my biggest gatherings, and it has always turned out superb.  I cut the original recipe in half, and made two individual single crust pie doughs. Below is the single crust recipe size.

Ingredients:
1 1/4 cups all-purpose flour
1/2 tsp salt
1/2 tsp sugar
1/2 cup (1 stick) cold unsalted butter, cut into small pieces
1/4-1/2 cup ice water

I pulsed the flour, salt and sugar together.


Then I added the butter to the flour mixture


and pulsed it until it resembled a corn meal.


Then added the ice cold water to the butter mixture with the food processor running until the dough just came together.  Note:  The recipe calls for ice water, so I filled my measuring cup to the 1/2 cup mark, and then filled the water with ice which is why it looks like I have a lot of water.


Made it into a round disk, wrapped it up in plastic wrap, and will keep it in the refrigerator until I make the pies on Wednesday.


You can refrigerate it for at least 1 hour or up to 3 days, which is perfect for a little extra time on Wednesday when it gets busy in the kitchen.

Picking up my turkeys tomorrow, making the cranberry sauce, sourdough bread, and starting to put my thanksgiving table together.   Cant' wait till Thanksgiving!!


0

Thanksgiving prep

Holy cow, can't believe it's thanksgiving already.  I'm so excited to host it this year, and have already started getting ready for the big feast.  I have quite a few recipes that I can chose from to create the best thanksgiving, from a different stuffing to a new brine for the turkey.  Here's my menu...

Brine Turkey
Mashed potatoes
Homemade green bean casserole
Artichoke Parmesan sourdough stuffing
Focaccia bread
Cranberry-ginger relish
Kale-brussel sprout salad
Plus two pies, pumpkin and pecan

We are also having a few appetizers before we eat the big feast.  You might as well go big or go home on this day to eat right?  Plus it's an extra reason to hang out with friends and family a little more.

Baked fontina
Veggie Tray
Caramelized poblano chili onion dip.

Now that we have the menu all planned out, I had to make a list of prep work that I needed to do each day starting today!  First thing was to make the sourdough starter that will be used to make the bread for the artichoke stuffing.  I didn't have a good recipe for sourdough bread, so a quick search on the internet found me exactly what I needed.  There are a few chefs that I know will have a great recipe, while I don't limit myself to just those chefs, thanksgiving is definitely a time not to experiment too much, right?  Go with who you trust!  So Emeril Lagasse it was.  Here is the link to the complete sourdough recipe, but just for today I needed to get the starter going.

Ingredients:
3 cups of warm water (110 degrees F)
1 1/2 tbsp active dry yeast
1 tsp sugar
3 cups all-purpose flour

I combined the water, yeast, and sugar, and let it sit until it became foamy, about 5 minutes.  Once that happened, I added the flour and stirred vigorously to work air into the mixture.  I covered it with cheese cloth, and put it in my warming draw set on the proof setting.  A quick peak gave me the reassurance that it was working well, and the smell is exactly like sourdough!

If you take a quick peak under the cheese cloth, and it's full of bubbly goodness.
I am so excited for the all homemade thanksgiving.  A few other items to make sure you have checked off your list of things to do...
Make sure if your turkey is frozen, take it out ASAP.  I will be doing a brine for the turkey, and it needs 24 hours to be in the brine before we cook it on Thanksgiving day.  I ordered mine from Natural Grocers, and will be picking it up on Tuesday, and putting it in my brine that evening.  I got 3 free range turkeys ordered this year.  One for thanksgiving, and two others for another special occasion like Christmas or a large gathering in the future.  The brine I use for this recipe also helps make the homemade turkey stock fabulous.

Tomorrow is pie dough making day, plus making the sourdough bread for the stuffing.  It will by far be my lightest day this week, but I'm so looking forward to a great thanksgiving day feast!
Tune in tomorrow for more of the thanksgiving prep work.


2

Sauerkraut Recipe

Out of all of the veggies I grew in my garden this year, by far one the most successful crops was my cabbage.  While I like cabbage, and eat it often, we had more than we could eat!  So what does one do with extra cabbage you say?  We make sauerkraut.  But how?  Having never made it before, I starting searching recipes on line, and found the perfect one for us.  I adore Alton Brown from the Food Network, so I knew that his sauerkraut recipe was going to be good.

Ingredients:

5 lbs of green cabbage, shredded
3 tbsp of pickling salt
1 tbsp of juniper berries
2 tsp of caraway seeds

Directions:

I used my food processor to shred the cabbage, then in a mixing bowl added the cabbage, salt, juniper berries, and caraway seeds, and mixed together thoroughly.  Make sure your hands are clean if using them to mix all the ingredients together.  Let stand for 10 minutes.

I transferred my cabbage mixture to a stainless steal pot.  To weight the mixture down so it stays in its juices, and covered it with cheese cloth.  I then used my pasta strainer, and weighted it down with a quart size mason jar full of water.

It was the perfect way to make sure the sauerkraut was weighted especially at the edges.


Placed it on the kitchen counter overnight, and by the morning we could see the liquid just covering the surface of the strainer.

I left my cabbage on the counter, and checked it periodically. If surface scum appears, remove it, however I didn't have any scum, just the brine liquid the cabbage was in.  I let it stand for 4 weeks, checking periodically. At this point Alton Brown's recipe transfers it to an airtight container that stores in the refrigerator for up to 6 months, I however wanted it to be canned, and put in my pantry.  I went to my trusty Ball Blue Book of preserving, and proceeded to follow their canning method.

I brought the sauerkraut to a simmer, around 180 degrees, but don't boil.  I used a thermometer to make sure I had the right temperature.


Once it reached that temp, I packed it in hot jars, leaving 1/2 inch headspace.    Ladled the hot liquid over the sauerkraut again making sure the headspace was 1/2 inch.  Removed any air bubbles, and put the two piece caps on, and processed my pints sized jars for 15 minutes in my boiling-water canner.


 My 5 pounds of cabbage yielded me about 5 pints.


We of course opened one the next night to eat with our brats, and I must say it was fabulous.
To see Alton's recipe, click here!
Happy canning!
-K-
0

Trip to Miller Farms

Took my kids on a last minute trip to Miller Farms up in Platteville, CO.  They have their fall festival that runs from just after Labor Day until mid way through November.  We were on the tail end, but for $10 a person to fill 5 bags of fresh picked veggies, it's hard to pass that up.

Everyone needs a picture with their head in a farm animal right?  This was just the beginning of our fun.
Extra activities for the kids, but the draw for us was the veggies, so off we went on the hayride to pick veggies from each section of their property.


There was popcorn we picked directly off the corn stalk.


As well as fresh corn on the cob.


We picked sweet potatoes and white potatoes, as well as acorn squash, butternut squash, a few white pumpkins, kale, onions, and carrots. Whew!  Totally amazing opportunity to check these items right off my grocery shopping list!


After all that we needed a rest.


A few carrots with a couple extra fingers!
Bags of potatoes, mom got a bag, and my sister got some, plus a whole drawer for us!
We got 5-6 butternut squash and gave two or three each to my mom and sister.  With so much bounty we just had to share.


Let the processing begin!
0

Fire Roasted Tomato Salsa Recipe

It occurred to me that in my last post I gave a small glimpse of what I had canned this year, but never gave out a recipe!  I got this recipe online, but for the life of my can't find it again. Glad I saved it.  It's not too spicy and a good depth of flavor, especially after is sits in the jars for a little bit.  We had eight jars this year, and most of them are gone already.  Clearly a family favorite, and worth sharing.


Fire Roasted Tomato Salsa Recipe

Ingredients

5 lbs paste tomatoes, preferably from your garden or local farmers market
2 lb mix hot & sweet peppers (adjust ratio to suit your taste)
1 lb mixed white onions with 1 head garlic (not to exceed 1 lb total)
1 cup apple cider or white vinegar (must be 5 percent acidity)
1 tbsp salt

The only rule is that you DO NOT CHANGE THE RATIO of tomatoes, peppers, onions/garlic and vinegar.
This keeps it safe for canning!

It being fire roasted tomato salsa, we must fire up the grill to give these veggies some fire roasting.  You can see a few of mix of peppers that I used.  Some jalapenos and poblanos for spice, as well as some green peppers.  I want to experiment with different ratios next year to make a spicier salsa.


After the fire roasting, I pulled off the charred skins of the peppers, and cored my tomatoes.  Also removed the skins from the onions and garlic (In the future I would probably cut the onion in half for better fire roasting).


Re-weigh all your ingredients again make sure the ratios didn't change, and it's safe for canning. Add some raw ingredients if necessary to make your ratios work.

Here's were I deviated from the recipe a little bit. It says to put all the ingredients into a food processor to get desired consistency.  I decided I wanted to use my new immersion blender to accomplish this step (I would make my chunks a little smaller in the future as well).  Added the vinegar and salt to the pot, and brought it to a boil.


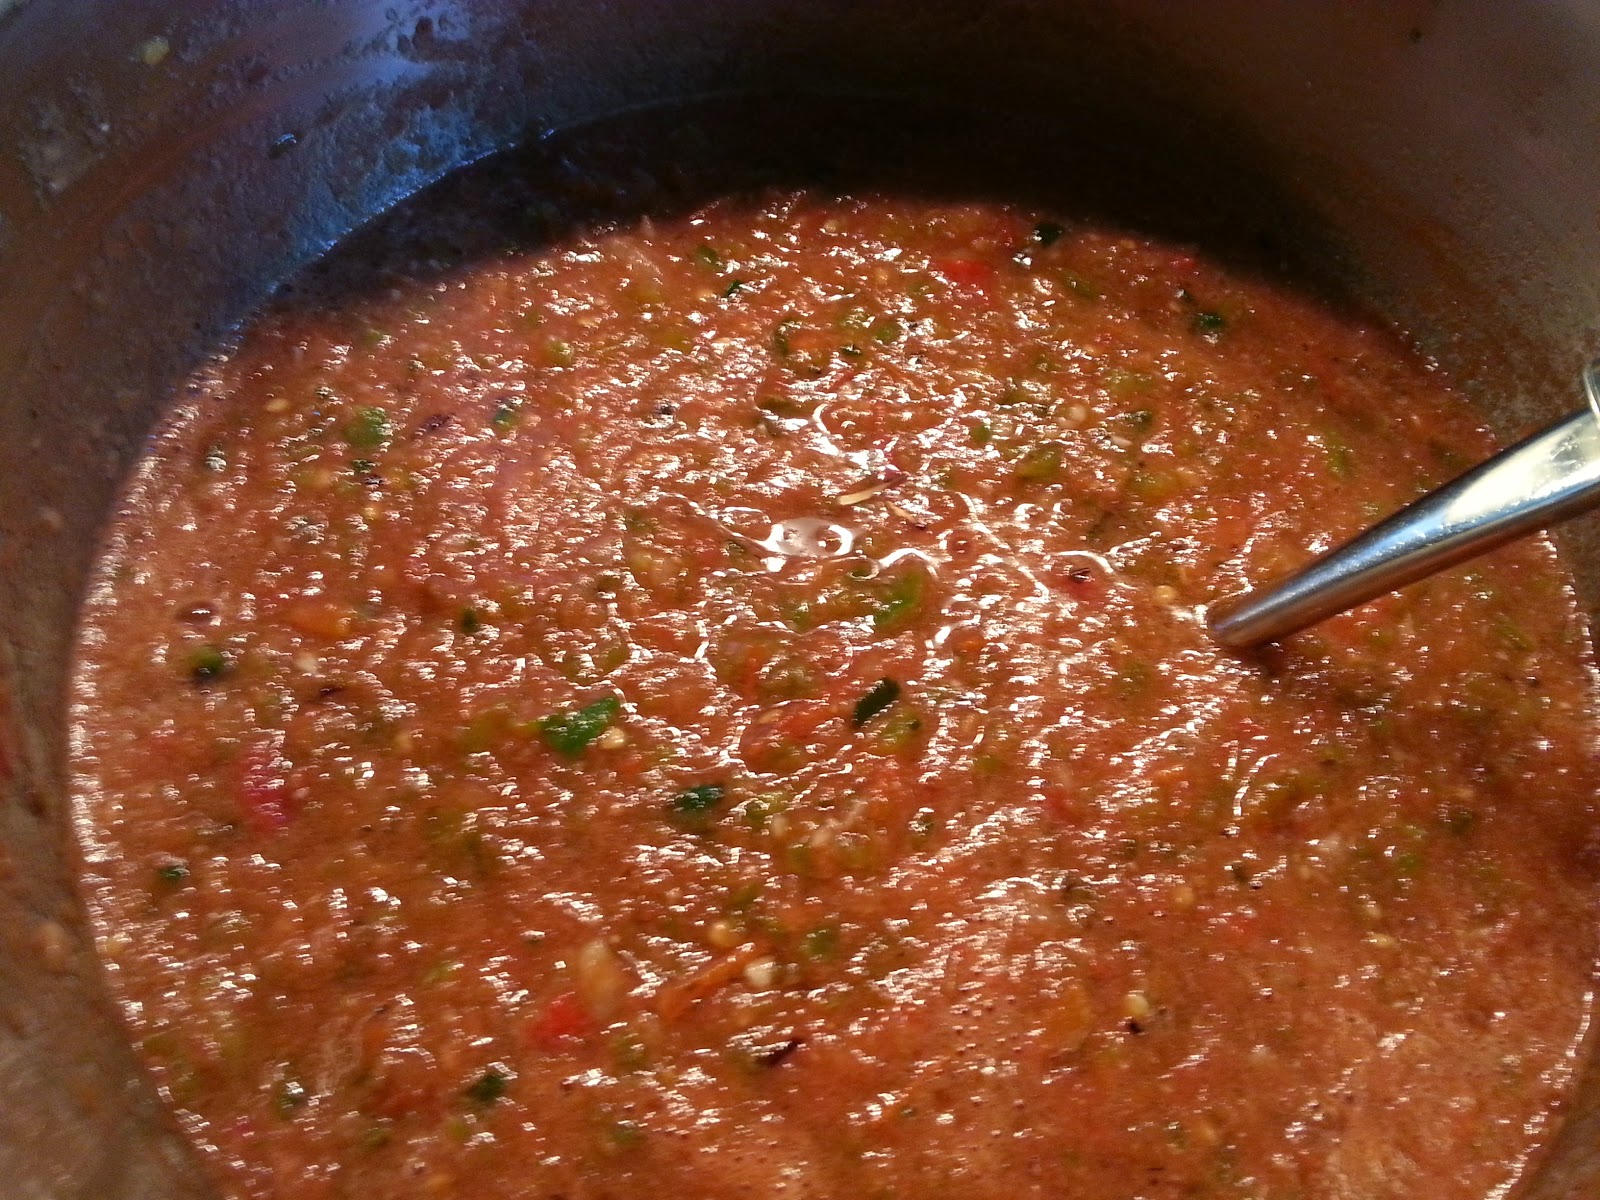
After I immersioned it (is that a word?), this was the look and consistency I was going after.  I lowered the heat and simmered it for 10 minutes. 

While the salsa was simmering, I prepared my hot water bath.  I heated my pint size jars and lids, I ladled the hot salsa into my prepared jars, leaving 1/2" head space.  Cleaned the rims and covered the jars with the hot two piece lids.  I then processed them in the canner for 15 minutes at a full rolling boil.


This recipe created 8 pint jars for me, the recipe said it would make between 6-7.  After it cooled we opened one right away, and found it to be sweeter that we thought it would be (hence the experimentation with the hot peppers), but after is was jarred for awhile we opened another to find the sweetness was mellowed, and it had a mild spicy flavor.


This was a great recipe for this first time salsa maker, and I look forward to tweaking it in the future for a more spicy flavor.


0

Fall in the Garden

This is probably my favorite time of year.  Had so much to harvest this year from our veggie garden, which brings with it lots of work canning and preserving the bounty.


 From the fire roasted tomato salsa...


to the jars of canned tomatoes...    
   
 
plus pickles and sauerkraut!     
        

Best year for the preserving and canning by far.  So now it was time to prepare for next season, cleaning up the garden, and trying my hand at growing garlic.  
  
I covered my garden in straw this year, which was the best thing I ever did.  I have always battled the weeds, and this year with the introduction of the straw the weeding was to a minimum!  YAY!  I hate to weed, along with most of us gardeners I'm sure.  Plus I watered less, and I'm improving the soil.  Win win all the way around.


 I pulled back the straw to put the individual bulbs in the ground, and once the greens start popping up, I'll put the straw back around them to cover the ground. 


 Seventeen garlic bulbs got planted, and I'm excited to see how they turn out.  First year garlic plant underway!

Any tips for growing garlic out there?  This first timer could use any helpful hints you all have!

The other item of business I needed to take care of was my blackberries.  I had several bushes bear fruit, but not quite as plentiful as I had hoped.  Needed to do some searching on the care of blackberries, and what I might be doing wrong.  The first place I always check is Mother Earth News, probably my favorite place to get veggie and fruit growing information.  I read an article Growing Berries in Your Own Backyard, which gave me some help and care for my blackberry bushes.  I decided to start from the beginning.  I don't know which ones had produced fruit in previous years and which hadn't, so cut them down I did.
Thought this would be the best way to start anew with my growing blackberry patch.

Plus all the clippings go into my compost bin to add better soil next year.  Looking forward to more blackberries in the summers to come.

Happy gardening, even late into the fall!
-K-


0

Little dedication and some play time

After the Back to School Prep, we were on to opening up that brand new playground dedicated to my friend's little boy who passed away a little over a year ago.  I had the honor of helping out with this dedication.
Yellow is his favorite color, so of course yellow was the balloon color choice...
As well as the color for the new playground equipment.
His family provided the extra special butterflies to release in his honor
Even found one on the playground equipment, how perfect!  (maybe with a little assistance from me!)
The butterflies were released, ribbon was cut, and it was on to playtime!

Little bit of breakfast made up of flapjacks and sausage

Perfect morning 
The butterflies even liked all the new flowers we planted!
Today is Dylan's birthday, join me in wishing him a happy birthday!


0