Colorado Inspired

Colorado Inspired
Colorado Inspired

Winter Wonderland Wood Sign

Winter Wonderland Wood Sign
Winter Wonderland

Valentine's Designs

Valentine's Designs
Valentine's Designs
Showing posts with label Gifts. Show all posts

Etched Glassware for a Perfect Port Party

Last summer a group of us girls went over the western slope of Colorado in Palisade where they are known for their wineries.  We went to vineyard after vineyard, toured wineries, and enjoyed of coarse some wine tasting.  After a fun filled weekend, we headed home with our wine and port, and promised ourselves we would get together for port party, and we finally did this past weekend.  I thought it would be fun for everyone to take home their own party favor which was an etched port wine glass.


Here's how they turned out!
0

Guess What Today Is? It's Closing Day

This is always the best day, closing day.  In the real estate market it is the culmination of a lot of hard work, but ultimately happiness on both sides.  Seller gets to move on to new and different adventures, and the buyer is happy to start a new chapter in a brand new home for them. The day wouldn't be complete until a little thank you gift is given.
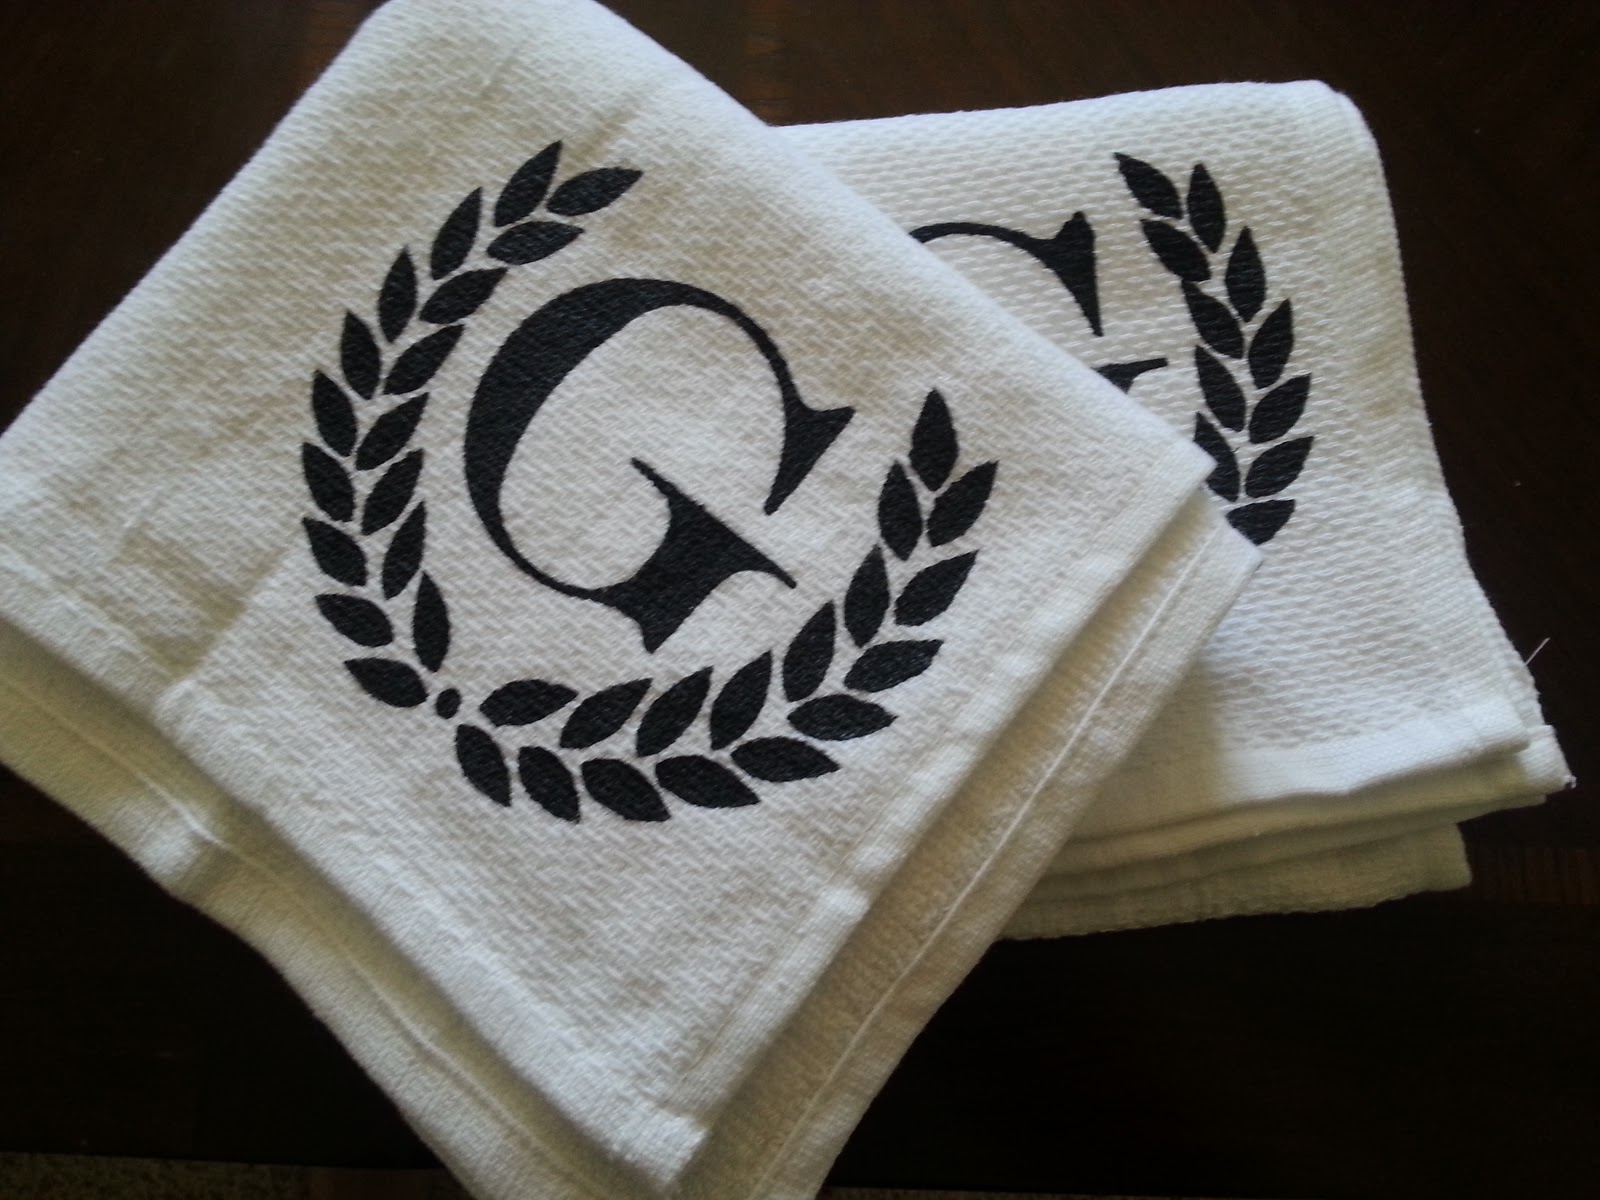
What do you get for sellers who are moving states, and can't take something too big?  A little personalized welcome decoration for their new home, complete with custom coasters, custom kitchen hand towels, and a handmade monogrammed candle with lantern.
Went to my gifts board on Pinterest for my inspiration.  These coasters were easy to make, and even easier to customize.

Went to my silhouette to design the custom monogrammed stencil for the kitchen hand towels.
And last but not least is the hand painted monogrammed candle with the lantern.
  Congratulations to my sellers, who are now officially off on their new adventure.  Thank you for letting me be your real estate agent, couldn't have asked for better clients!
0

Creative Kids Birthday Basket

My niece just turned six this month, and I wanted to make her something special.  She is an on the go, playful, and creative kid, so what better than a gift to be creative, color, paint, and more.

 I think the finished product turned out perfect, and will be ready for whatever creative whim comes her way.
I started off by making some of the basket necessities.  The first was sparkling playdough.  I went to trusty Pinterest to find my recipe.  I found the one I liked the best...
Sparkling Playdough Recipe
I cut the recipe down to a quarter of it's original size.  I only needed a little bit, and I wanted different colors


Next the glitter slime.  This stuff is so cool, Elmer's glitter glue, water and borax.  Couldn't be easier to make, and more fun to play with.
Glitter Slime Recipe

Finally the homemade finger paint.  I used neon food dye to give it an extra pop of color.
Homemade Finger Paint Recipe
I went to my silhouette to create the labels for the tops of my jars, and used mod podge to attach the label.
I also made these clip art scenes on my computer.  Took them to an office supply store close by (Staples), and had them blow up my
 8 1/2 x 11 sheet to poster size.  I wanted my niece to be able to hang this on her wall, and color till her hearts content, and then have artwork for her room when she's done.
Purchased some crayons, markers, and an extra pack of paper.  One last thing to make it complete...
Found an old shirt at my local thrift store, got some iron-on letters to spell her name.  Now she's got a personalized shirt to get paint on, and no one needs to care!!
Can't wait to see what she creates.
3

Birthday gift for my sister

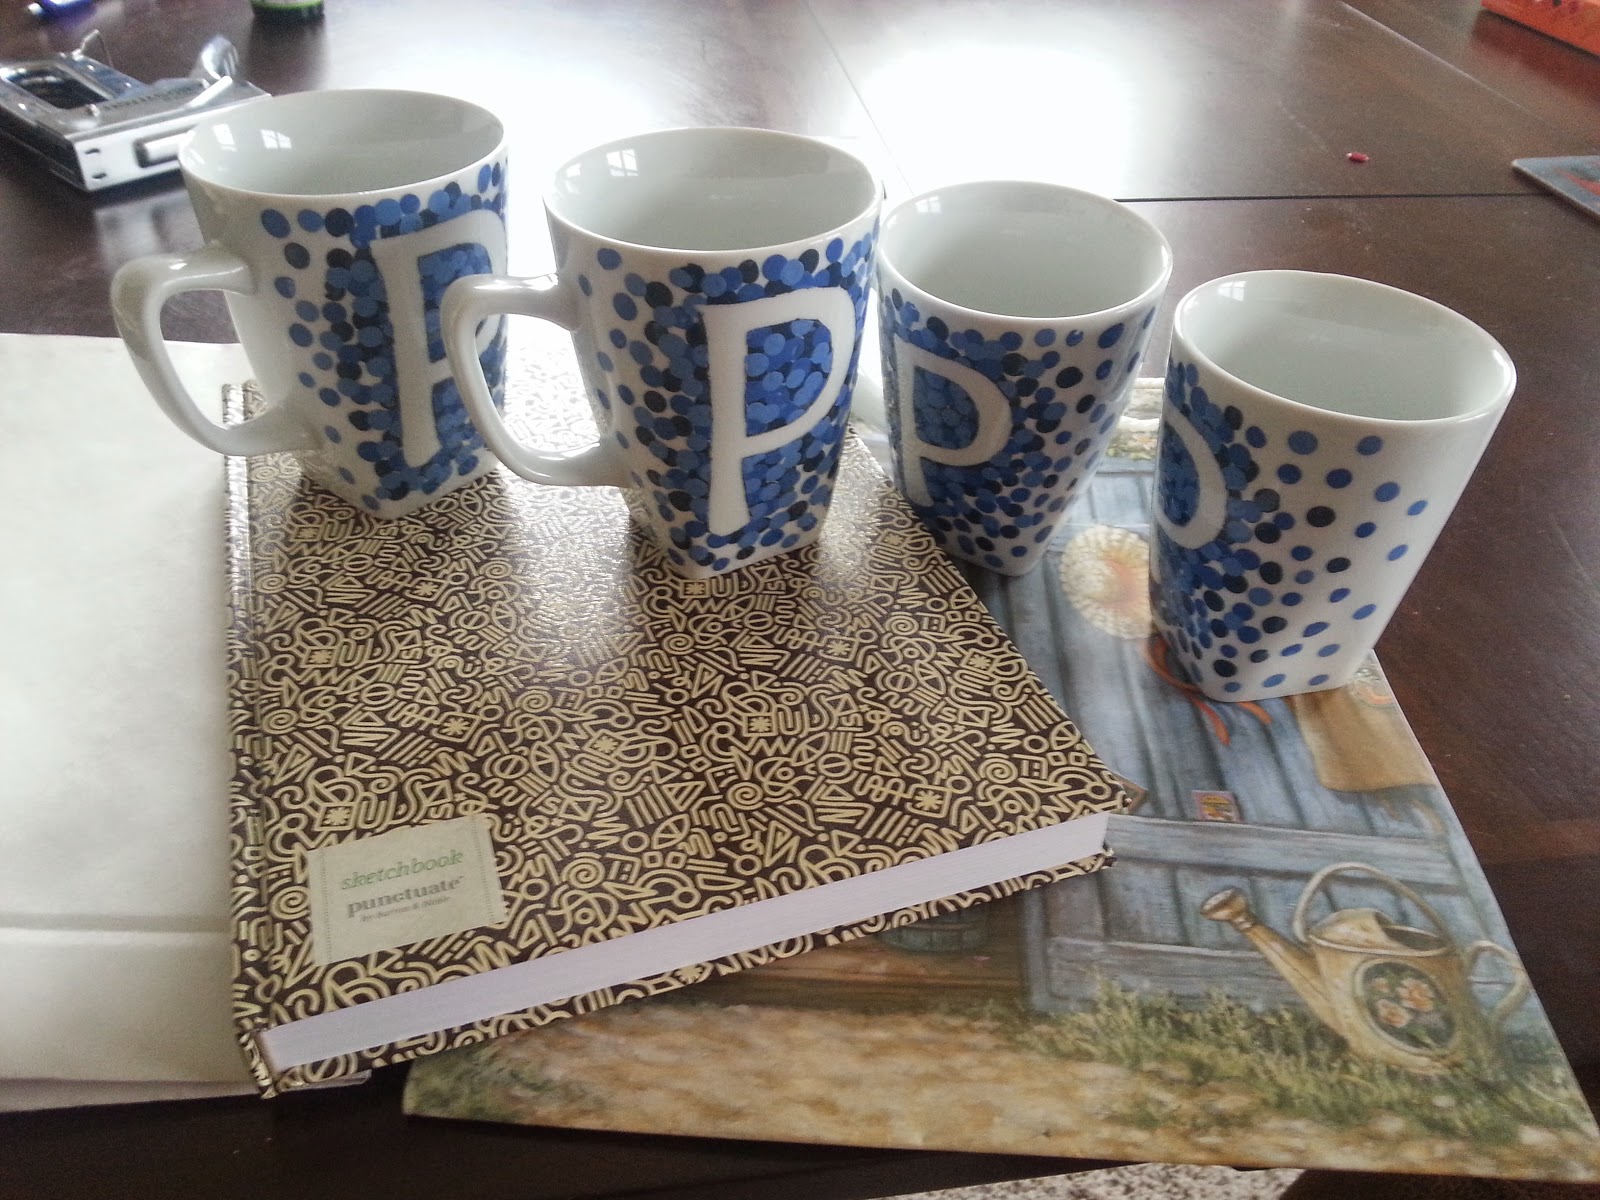
My sister just recently had her birthday, and I wanted to make her a gift this year.  She just recently added to her family with another little one, and I thought nothing was more perfect than to start a recipe book of her own so she could compile the best recipes she's got in one place.  But also added a personalized set of mugs for those early mornings, so she will have a fun mug for her first cup of coffee or tea.

I think they turned out perfect, and were very easy to make.


I used my silhouette to cut out the P (for her last name) in the font that I wanted, made four of them, and just used plain construction paper, nothing fancy.  In the future though I would use a sticker of some sort instead of placing them on my cups with double sided tape.  The edges around the P needed some cleaning up which would have been prevented if I had used a sticker.

I used ceramic paint that I picked up at my local craft store.  I decided blue was the color I wanted to use, and added black to darken the first color. Added white to create the lighter blue on the last layer.


I took a pencil eraser, dipped it in the first paint color, and started dotting up my cups.  After the dark paint layer dried, started with the next shade of blue.


When the third and final layer was on, and mostly dry, I removed the stencil, and started making clean edges around the P.
First used the exacto knife to scrape away the paint that bled under the P stencil.  Then took Q-tips to wipe away any extra paint to get a nice clean look.
Baked the cups at 300 degrees for 35 minutes to set the paint, and it's now permanent.
Picked up a sketch book at my local book store, and copied some of my favorite recipes to get her book started.  With many pages left she can add all her favorites, and have the most tailored cookbook just for her and her family.


Happy Birthday Sis!
2

Homemade Gifts for Any Occasion

Looking for a little gift inspiration, well look no further.  With a little time and imagination this gift came to life which is perfect for any gift giving occasion from birthdays and Christmas to a house warming party.  Etching glass is an easy way to personalize these glasses for a special gift.


I went to Walmart, and purchased a set of eight glasses that would be perfect for etching, this set cost me around $8.


Went to my silhouette cameo, and sought out to find a Colorado themed logo that would work. The sky's the limit for creative juices, Colorado was my theme of choice for this one.


I've already cut it out using construction paper to see how it might turn out.  And perfect it is.


Went to my local Hobby Lobby craft store, and purchased an adhesive, reusable etching stencil that I could send through my silhouette to be cut.


Followed the instructions for the etching cream, covered the area I wanted etched liberally with the cream, and allowed it to sit for 15 minutes.  Then washed off the cream with water.


I think they turned out perfect.  I'm ready for the round of birthdays coming our way.  Added a six pack of your favorite beer or classic root beer, and you have an inexpensive personalized gift.


Even made a few just for me!


0